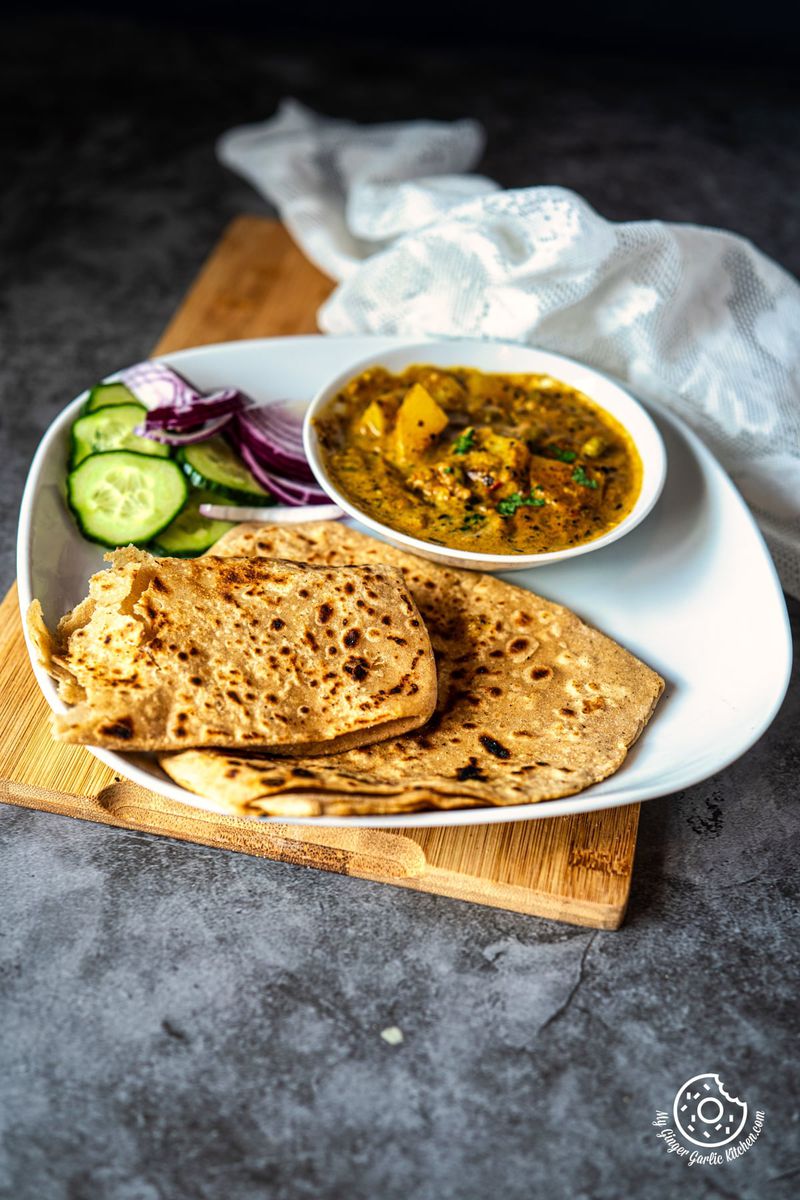
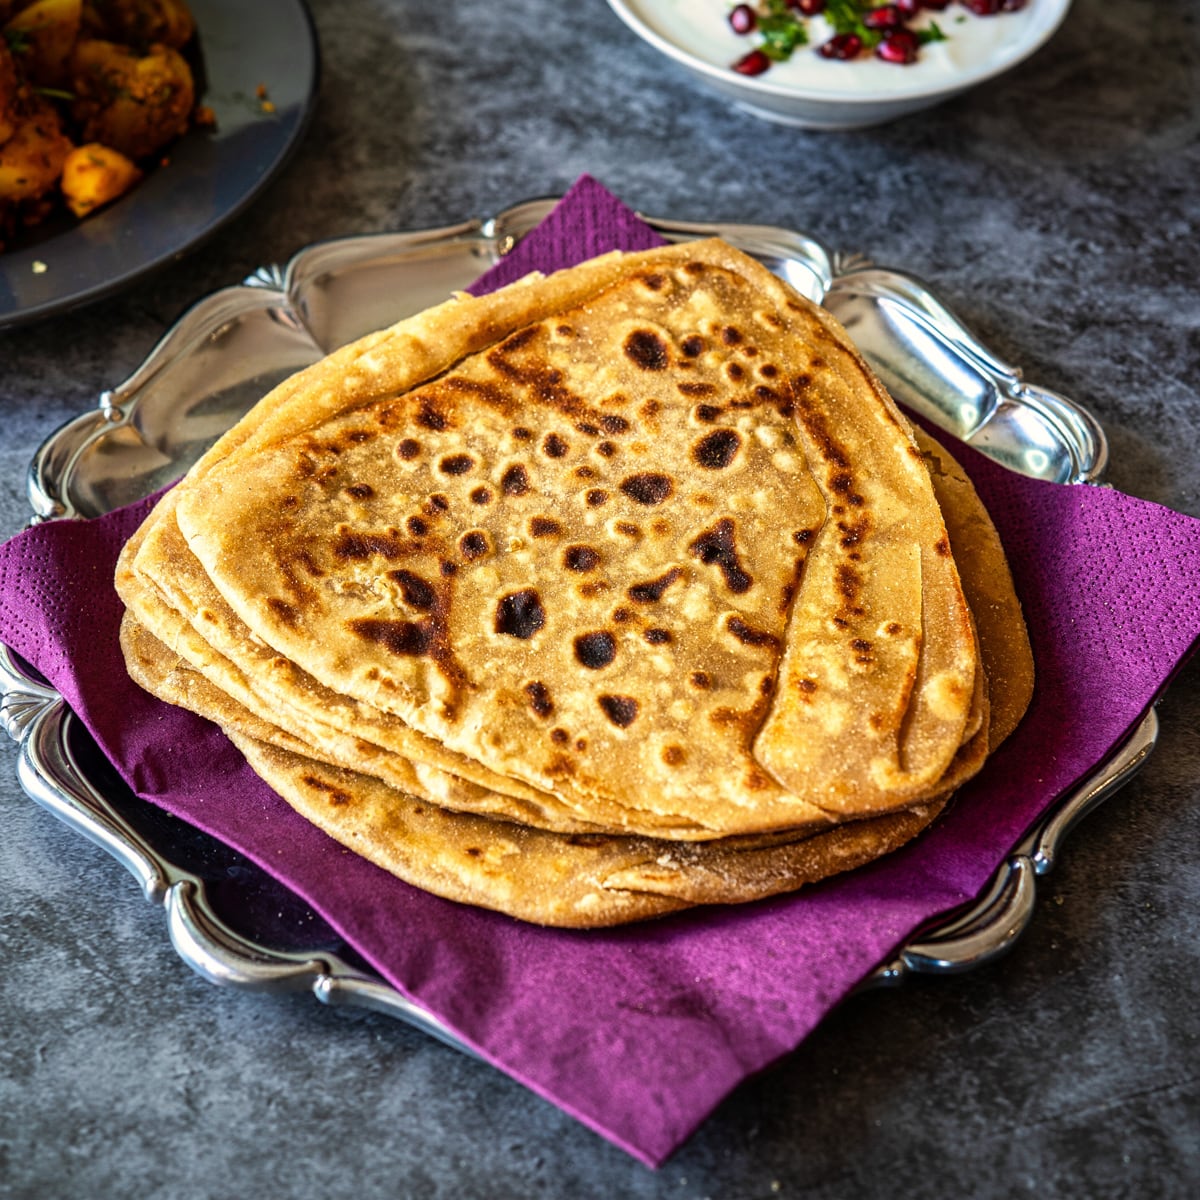
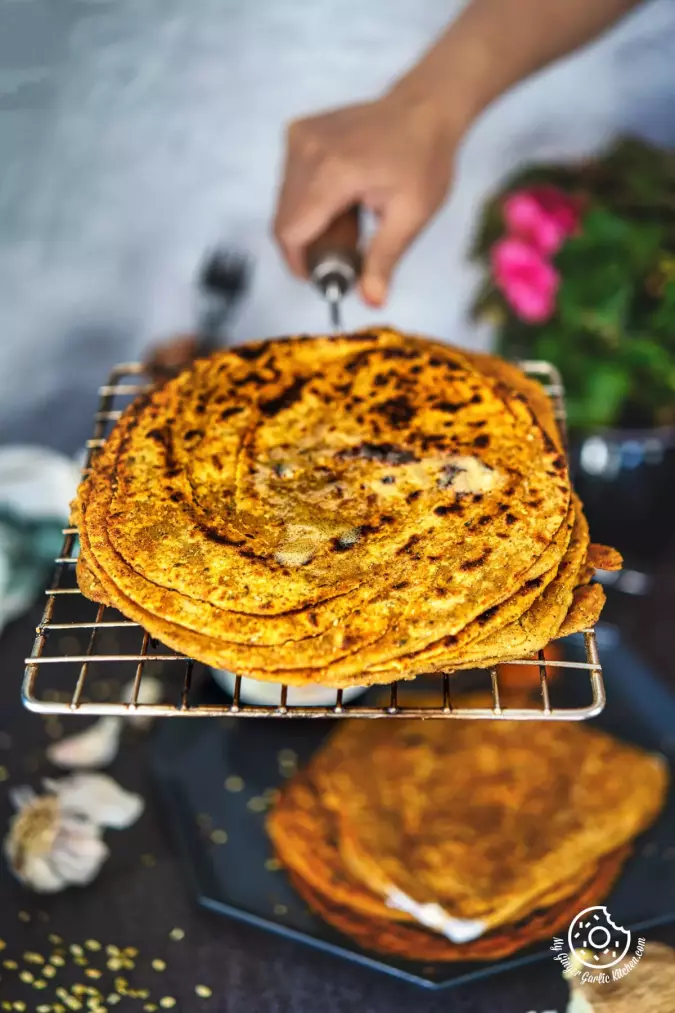
Plain Paratha is a crispy, flaky Indian flatbread known for its simplicity and versatility. This traditional unleavened paratha has tender, crisp layers which make it the pure essence of comfort food. Known for rich flavors and textures, this paratha is an ideal accompaniment to dals and curries.
Nut butter adds binding and richness naturally. It improves texture in eggless cookies.
Don’t want to miss such incredible time-saving tips from My Ginger Garlic Kitchen, set us as a preferred source in Google Search by clicking the button below.

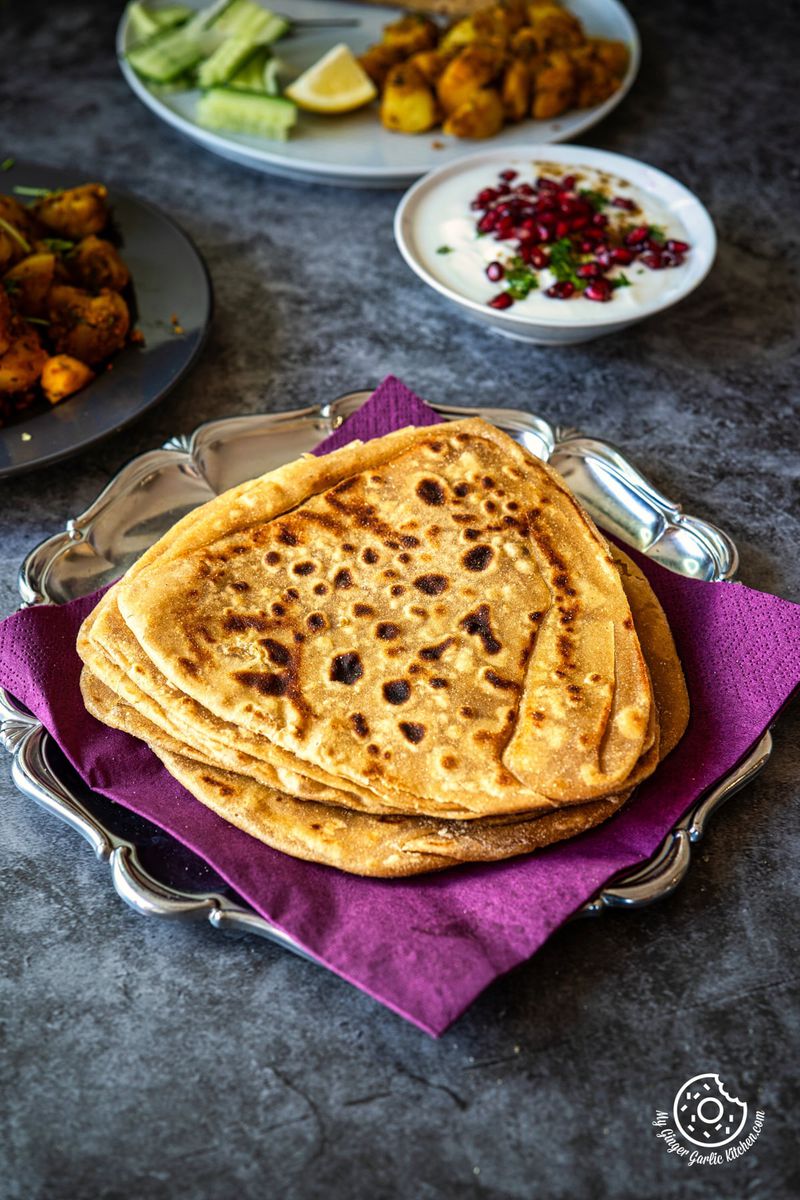
Table of contents
This classic flatbread is cherished for its rich wholesome taste and is a staple on Indian dining tables. Made with 4 simple ingredients, it gets ready in 20 minutes.
On this page, explore easy plain paratha recipe with step-by-step photos and video instructions. Also, I have shared some useful tips, tricks and variations to make the perfect fail-proof paratha each time.
About Paratha
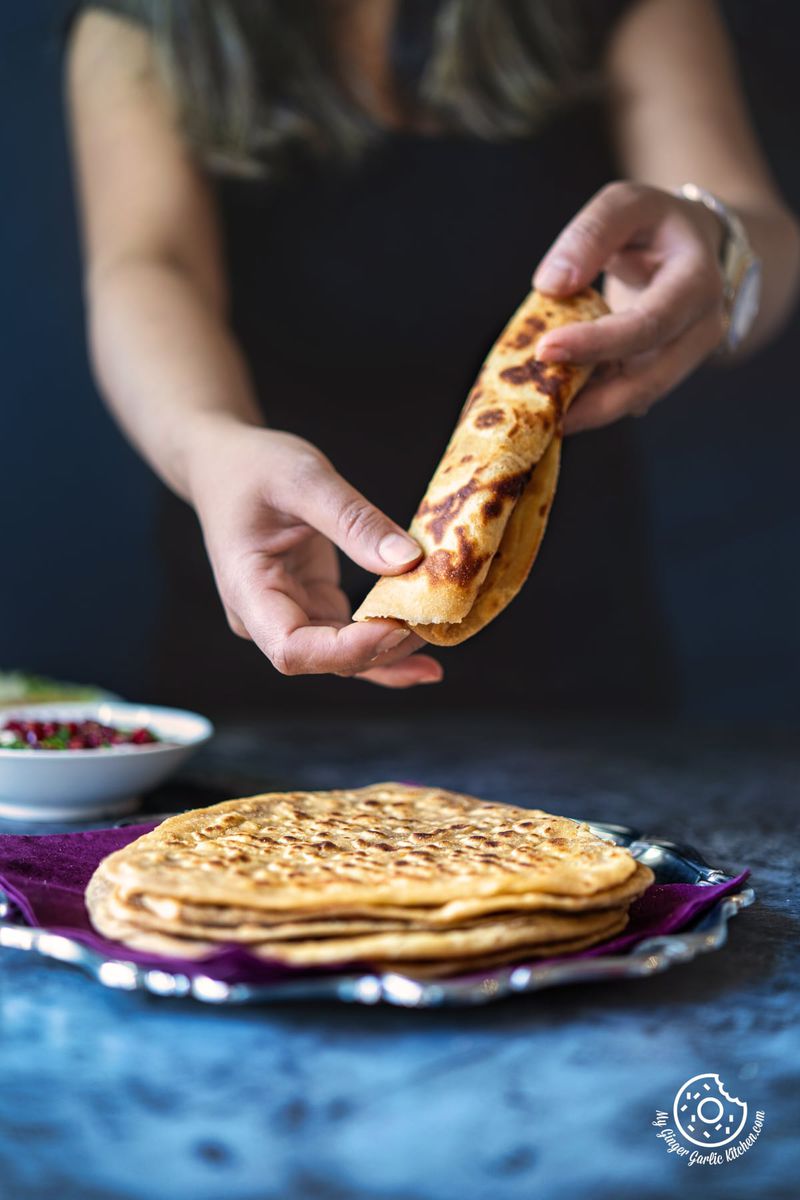
Parathas are plain and simple flatbreads made from whole wheat (atta) flour, and a handful of basic ingredients. It is a perfect balance between a tender, flaky interior and a crisp, golden-brown exterior.
The name of this dish, “Plain Paratha,” might sound simple, but it has the ability to elevate any meal. Whether served for breakfast, lunch, or dinner, this classic flatbread is sure to fulfill your cravings.
The plainness of this paratha makes it the perfect accompaniment to a wide range of curries, chutneys, and pickles. This humble flatbread can transform any meal into an exotic meal experience.
This flatbread recipe involves kneading of a soft dough, which is then expertly shaped, flattened, and meticulously folded multiple times to create some flaky layers.
After that, they are rolled, and splendidly roasted to perfection and served warm alongside a diverse array of Indian culinary delights.
Plain paratha, such as the ones made using this recipe have the layered and flaky plain Paratha. It is a popular North Indian Paratah recipe that holds an esteemed place in Indian cuisine.
They are an essential part of daily meals in Indian households, as well as in the restaurants across the nation.
This goes amazingly well with sabjis, dals and curries. Another remarkable thing about plain paratha is that they are a delightful treat on their own or when paired with a soothing cup of tea. Alternatively, you can also make a wrap or a quesadilla. Sometimes, I even relish snacking on parathas with tempting accompaniments such as besan mirchi ke tipore, mirchi ka thecha, or mango pickle or various fruit jams.
The world of parathas has many stuffed varieties like Aloo Paratha, Paneer Paratha, Cabbage Paratha, Avocado Paratha, Bhujia Paratha, Mooli Paratha, and Khichdi Paratha – each a frequent guest on my dining table.
However, this wonderful non-stuffed paratha recipe holds a special place in my heart, as it was the paratha my Mom packed in my lunch almost every day. It was my go-to side dish with all the dry sabji’s my Mom packed in the lunch box.
On the weekends, sometimes when my mom prepared sumptuous gravies such as Paneer Butter Masala, Paneer Lababdar, Kadai Paneer, Chana Masala, Dal Makhani, or Shahi Paneer Korma, she accompanied them with this paratha.
There is a charm about the delightful contrast between the fried, crispy exterior and the soft layered interior that makes it an excellent choice for scooping up these dishes or any other saucy, stew-like main courses.
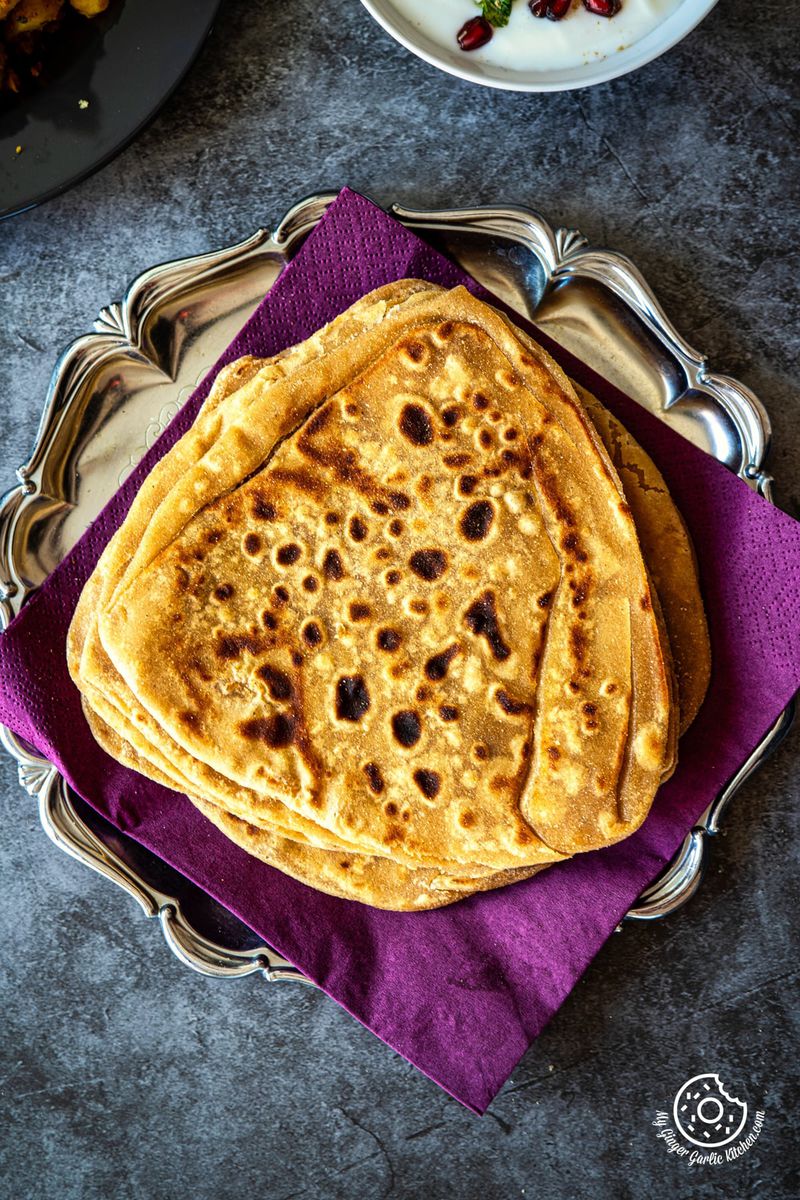
On this page, I have shared two paratha techniques for rolling and shaping the paratha: Triangular shape and Regular square shape.
You can use any method that suits you, they both make amazing plain paratha.
This Plain Paratha
✔ is simple & easy to make
✔ makes a filling & nutritious meal
✔ is crispy & tender
✔ is suitable for breakfast, lunch, & dinner
✔ pairs well with almost everything
✔ is a traditional Indian food
✔ can be made vegan & gluten-free
✔ is gratifying & filling
✔ keeps you satisfied for hours
Ingredients
- Whole Wheat Flour: Gehun Ka Atta aka whole wheat flour which is rich in essential nutrients and dietary fiber is the heart of this recipe. It is used to form the paratha dough.
Alternatively, it can be substituted with other flours such as all-purpose flour, multi-grain flour or any gluten-free flour.
-
Liquid: You will need some liquid to bind the dough. You can either use milk or water or knead the dough. If you prefer rich flavors, then use milk as I did or use plain water for a lighter version.
-
Ghee/Oil: You will need some fat ghee/oil for kneading dough, and it’s also used for cooking the parathas.
-
Salt: Also, a little bit of salt is added to enhance the taste of the paratha.
Variations
-
Methi Paratha (Fenugreek Paratha): You can add some fresh methi to the paratha dough to make it more delicious, nutritious and fiber rich.
-
Ajwain paratha: Flavored with carom seeds (ajwain), these parathas have a distinct and aromatic taste. For this version, use some crushed carom seeds aka ajwain to the dough. It elevates the overall taste of paratha while adding aids in digestion.
-
Kasuri methi paratha: Dried fenugreek leaves make a great addition to any paratha dough. As they infused the plain paratha with the earthy aroma and slightly bitter taste of fenugreek leaves. You can also add some spices of your choice to make it more flavourful.
-
Masala Paratha: If you like Spiced Paratha, then feel free to season the dough with a blend of aromatic spices, Masala Paratha offers an extra punch of flavor. They make a wonderful tea-time snack when paired with hot chai or coffee.
-
Besan Paratha: Here, you can swap 1 cup of whole wheat flour with the same amount of besan or chickpea flour. These Chickpea Flour parathas have a nutty and satisfying flavor.
-
Vegetable Paratha: You can add about 1 cup of minced or grated vegetables to the dough. You can also add some flavourful spices to this recipe.
-
Onion Paratha: In this version, you can add some sliced or finely chopped onions to the for a mild sweetness, crunch, along with a pungent flavor. They are perfect for those who enjoy the taste of onions.
-
Sweet Potato Paratha: For this variation, add about 1 cup of grated cauliflower to the dough and adjust the liquid accordingly. Spice the dough with a medley of aromatic spices to make this paratha more delightful.
-
Palak Paratha (Spinach Paratha): To make palak paratha, replace liquid with 1 cup of spinach puree. It enriches the parathas with vibrant green hues, with a healthy twist.
-
Pudina Paratha (Mint Paratha): For the refreshing touch, add some torn or chopped mint leaves to the dough. They add a unique flavor profile. You can also add 1 tablespoon of mint powder for more intense mint flavors.
Serving Suggestions
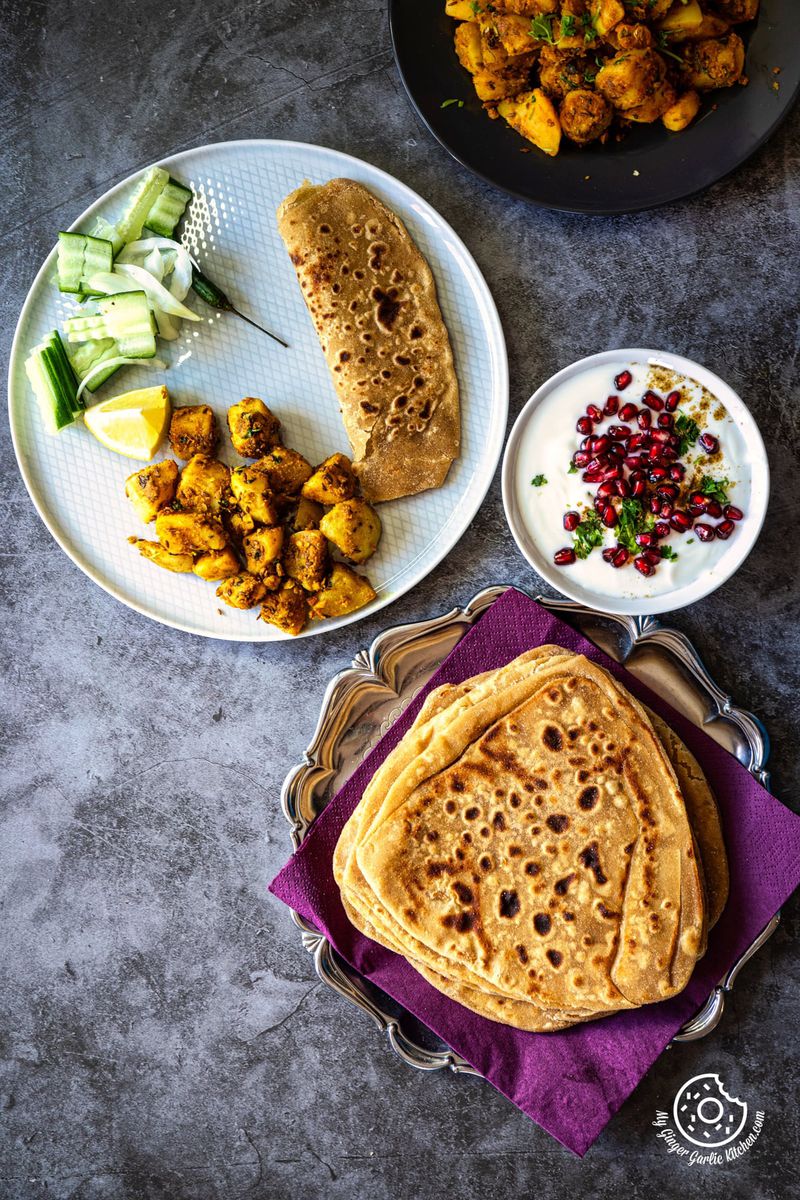
For an ultimate paratha experience, you can enjoy plain paratha hot straight from the griddle because its crispness and flavors are at their peak at that time.
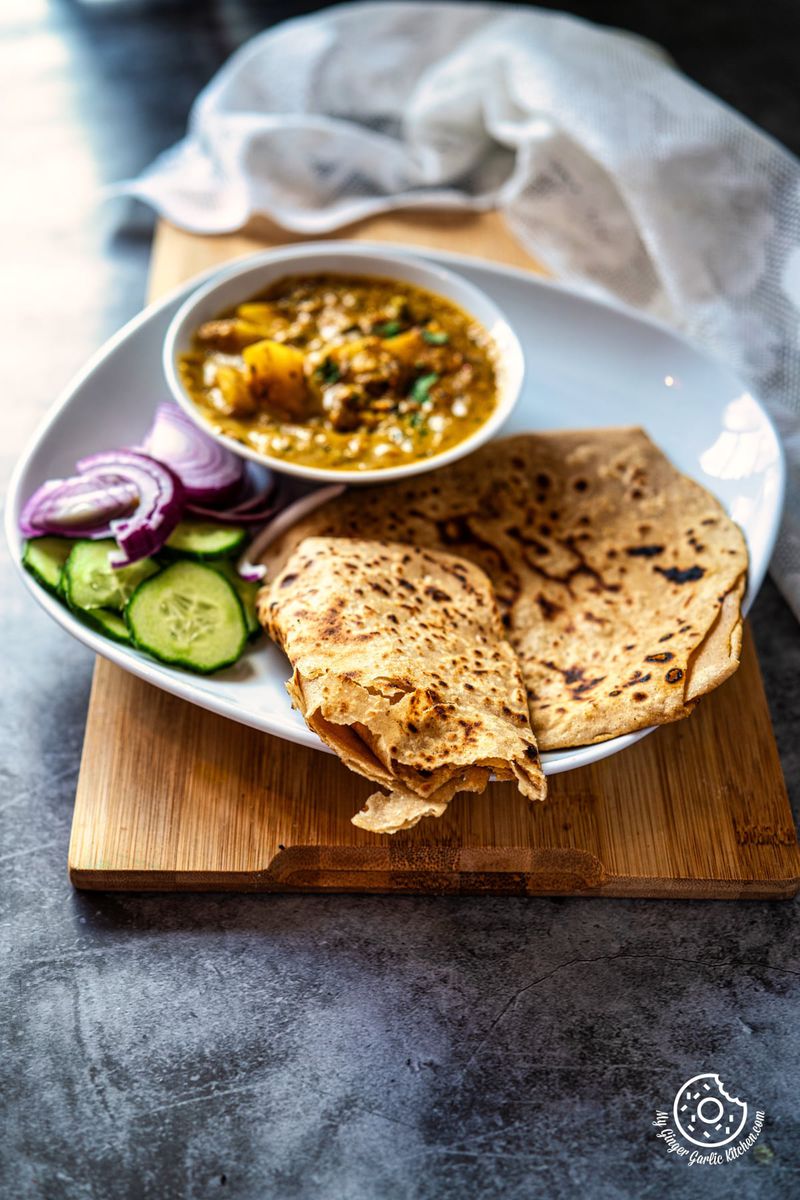
There are endless ways to enjoy a plain paratha as it merges well with everything. You can pair it with a dollop of butter, some plain yogurt, assorted raitas, and a variety of pickles and chutneys.
For a richer meal, serve these with your choice of curries like paneer jalfrezi, shahi paneer korma, or chole masala. You can also have them with dals like Chana Dal, and dry subzis like Jeera Aloo, or Instant Pot Aloo Gobi.
For an ultimate comfort meal, accompany it with rajma masala, paneer pulao, fresh salad, papad, and bread roll for a complete feast.
Storage Suggestions
These plain paratha tastes great when they are fresh as they are hot and crispy at that time. But they also taste rich, soft and delicious the day after due to the addition of creamy milk.
If you have leftovers (milk paratha), then store them at room temperature for 1-2 days. Water parathas stay fresh for up to 1-2 days in the refrigerator.
To store, allow the parathas to cool completely, then wrap them in kitchen tissues, followed by plastic wrap, and then place them in an airtight container.
Reheating: Whenever you want to serve, simply reheat the parathas on a preheated griddle until warm and crisp and enjoy them with your favorite sides.
Professional Tips & Tricks to Make the Best Plain Paratha
-
Dough consistency: When kneading the dough, make sure it is of soft and pliable consistency for easy rolling. If the dough is too dry, then the parathas will become hard; if it’s too wet, they may tear while rolling. Also, add some ghee or oil into the dough. It makes soft and flavorful parathas.
-
Resting time: Make sure that you allow the dough to rest for at least 15-20 minutes. This resting period is crucial as it relaxes the gluten in the flour, making it easier to roll out.
-
Uniform Rolling: When rolling, aim for uniform thickness as the uniform rolling ensures that the parathas cook evenly.
-
Dry flour for rolling: When rolling parathas, use dry flour for rolling out the parathas. This prevents sticking and makes the rolling process smooth.
-
Cooking: When roasting parathas, press it down gently using a spatula. This helps in creating delightful layers.
-
Medium Heat: Always cook the parathas on medium heat for even and perfect cooking. The high heat will burn them, and with the low heat your parathas may turn soggy.
-
Serving: Plain Parathas taste best when they are fresh, hot and crisp. You can serve them with curry, dal, chutney, raita, and pickle of your choice.
-
Brushing with Fat: While cooking, make sure to brush the parathas with ghee, oil, or butter. Some kind of fat adds an aromatic flavor and also helps in achieving that beautiful golden-brown color. It also helps in getting a crispy texture.
-
Keep Parathas Covered: When you are not serving parathas at once, then keep them covered with a clean kitchen towel or wrap them in a kitchen tissue to keep their warmth and softness.
-
Spices: For added flavors, feel free to add the spices of your choice.
-
Cooking Variations: While the traditional way is on a griddle, you can also make parathas on a non-stick pan or tawa. Just ensure it’s well-heated before placing the paratha on it.
-
Freezing Parathas: If you want to store parathas for a longer period, then consider freezing them. To freeze, place a small piece of parchment paper between them- This prevents sticking and makes it easier to separate them when needed. Then wrap them in a cling wrap and then transfer them to an air-tight container and freeze for up to 2 months. When you want to serve, thaw them overnight in the refrigerator and reheat them on the griddle.
-
Customize: Feel free to customize the paratha with your favorite ingredients. For example, you can add some spices, herbs, grated vegetables, cheese, or even leftover curry, or leftover khichdi for making dough.
FAQ
Can I freeze Plain Paratha?
Yes, you can freeze the parathas. To freeze, let the parathas cool completely, then place parchment paper between each paratha to prevent sticking. Then wrap the parathas in plastic wrap and freeze in an air-tight freezer-safe container, or a freezer bag for up to 2 months.
Then reheat them on a griddle when needed.
Can I use all-purpose flour for making paratha?
Traditionally, whole wheat flour is used for making plain paratha. But you can surely use all-purpose flour for a different texture and taste.
Can I prepare the dough in advance?
Yes, the paratha dough can be prepared ahead of time. Make the dough, apply a little ghee or oil on it, wrap it in a plastic wrap and then transfer the dough to an air-tight container and refrigerate. This dough stores well for up to 2 days.
When you want to make parathas, thaw the dough at room temperature and roll as instructed in the recipe.
Can I make mini–Plain Parathas for parties or appetizers?
Surely, you can make perfect mini–Plain Parathas for bite-sized appetizers at parties and gatherings. Mini parathas make delicious finger foods. While rolling, just adjust the size and follow the regular cooking process.
How can I store leftover Plain Parathas?
To store leftover parathas, let them cool completely. Once they are cooled, wrap them in kitchen tissues and then in plastic wrap. Place the wrapped parathas in an airtight container and store them in the refrigerator. They stay fresh for up to 1-2 days.
When you want to eat, reheat them on a preheated griddle over medium-low heat until they are fresh and crisp again.
Is it necessary to use ghee or oil while cooking Plain Paratha?
Yes, using some kind of fat is essential for achieving that aromatic flavor, crispy texture, and golden color.
Can I cook frozen Plain Paratha in a microwave?
You can use a microwave for reheating, but using a stovetop pan is recommended to achieve crispy texture.
Can I make Plain Paratha with gluten-free flour?
Yes, you can make Plain Paratha with gluten-free flour, such as rice flour or sorghum flour. Follow the same process for making the dough but be mindful that the texture and flavor may vary slightly with different gluten-free flours.
Can I use gluten-free flour for making Plain Paratha?
Yes, you can use a gluten-free flour of your choice to make Plain Paratha.
Can I add additional spices or herbs to Plain Paratha for extra flavor?
Yes, adding spices and herbs is a lovely idea. Spices add a tempting flavor to the paratha. Feel free to experiment with your favorite spices or herbs to make it suitable for your taste buds.
Can I make a vegan variation of Plain Paratha?
Yes, you can make vegan versions of Plain Paratha. For the vegan version, make sure you replace ghee with plant-based oil and avoid adding milk.
Can I make a gluten-free variation of Plain Paratha?
For making the gluten-free version, substitute the whole wheat flour with any gluten-free flour of your choice.
Plain Paratha (Step-by-step photo instructions)
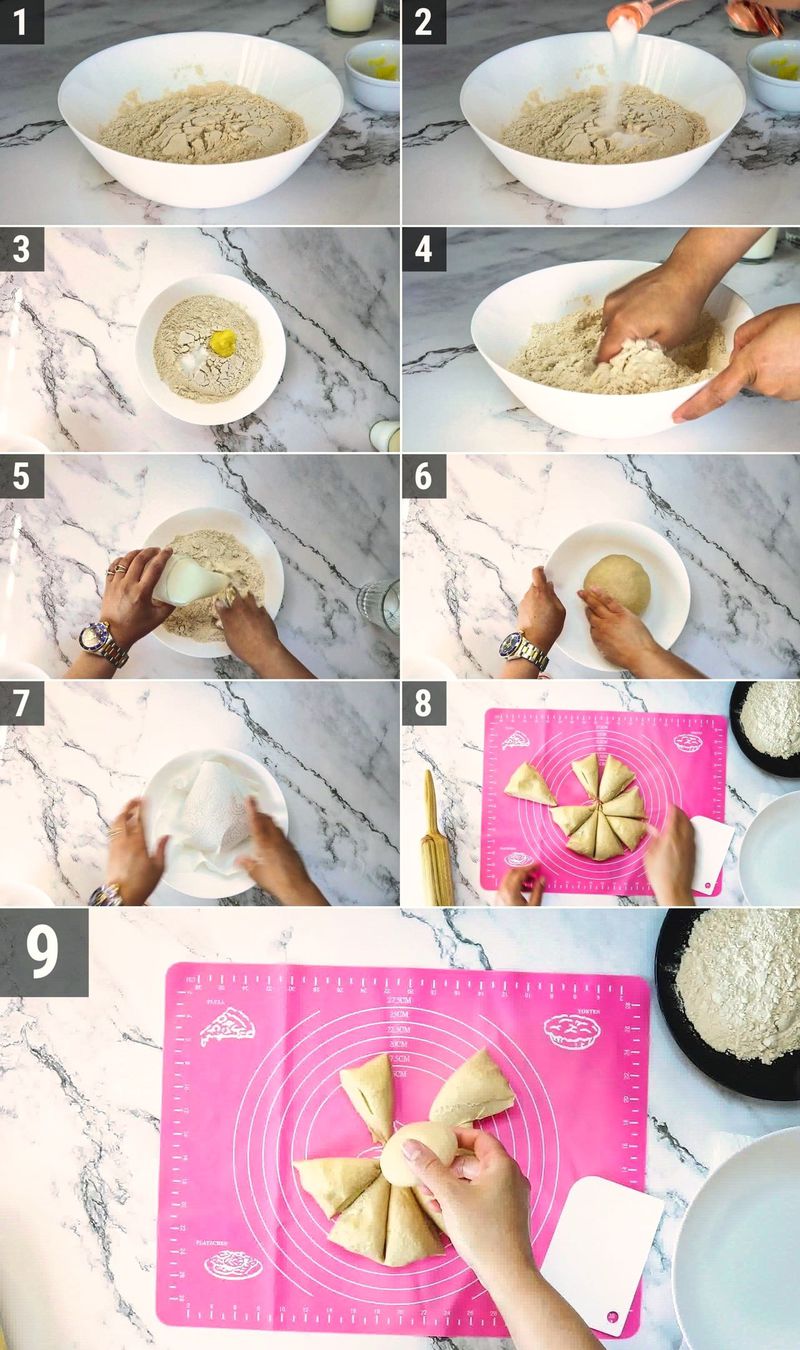
Prepare the Dough:
- In a mixing bowl, combine the whole wheat flour and salt. Mix them thoroughly. Add ghee (or oil) to the flour to enhance the flavor and texture of the parathas. Gradually pour in milk (for a richer taste) or water (for a lighter option) while kneading the dough. Adjust the amount of liquid as needed to achieve a smooth and soft dough. Cover the dough with a damp cloth and let it rest for at least 15-20 minutes. This resting period improves the softness and pliability of the paratha dough. After resting, divide the dough into equal-sized balls, each slightly smaller than a golf ball.
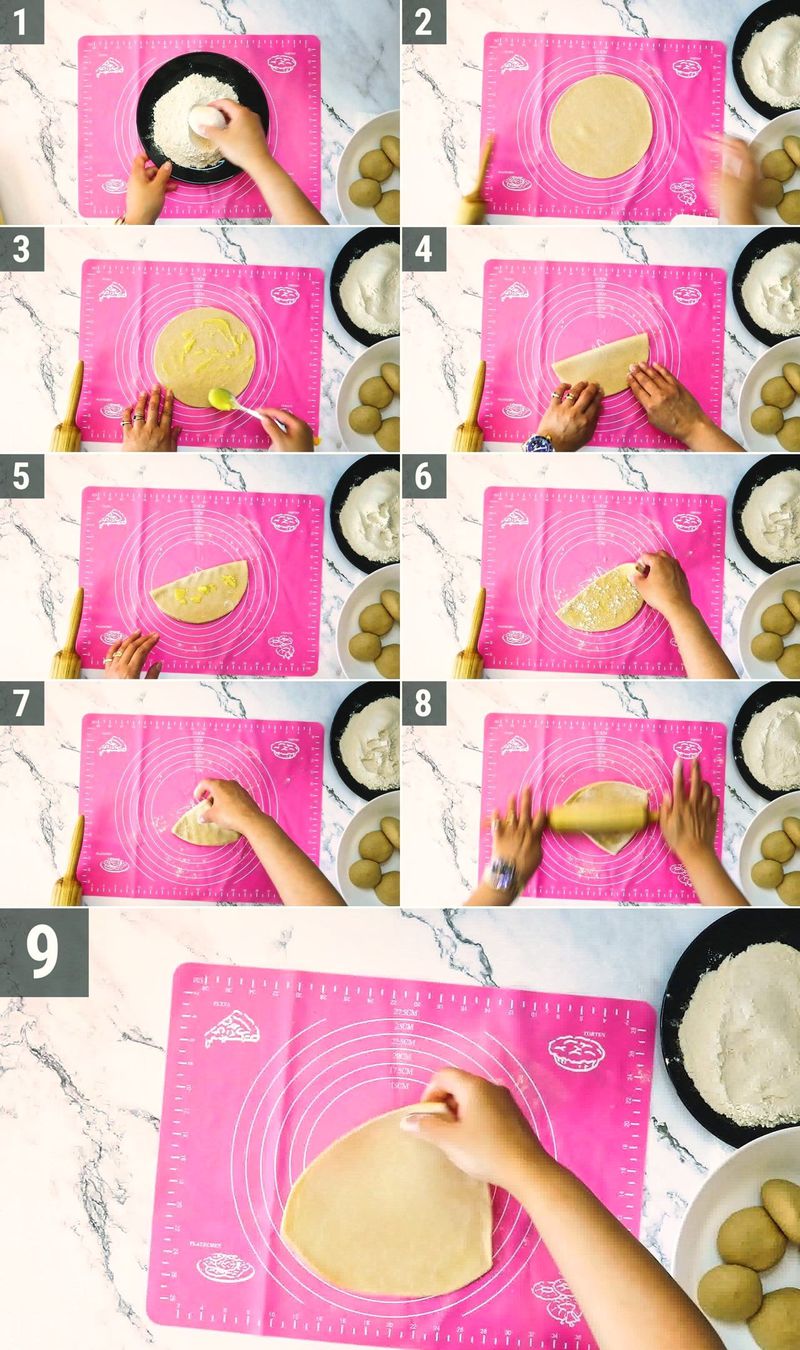
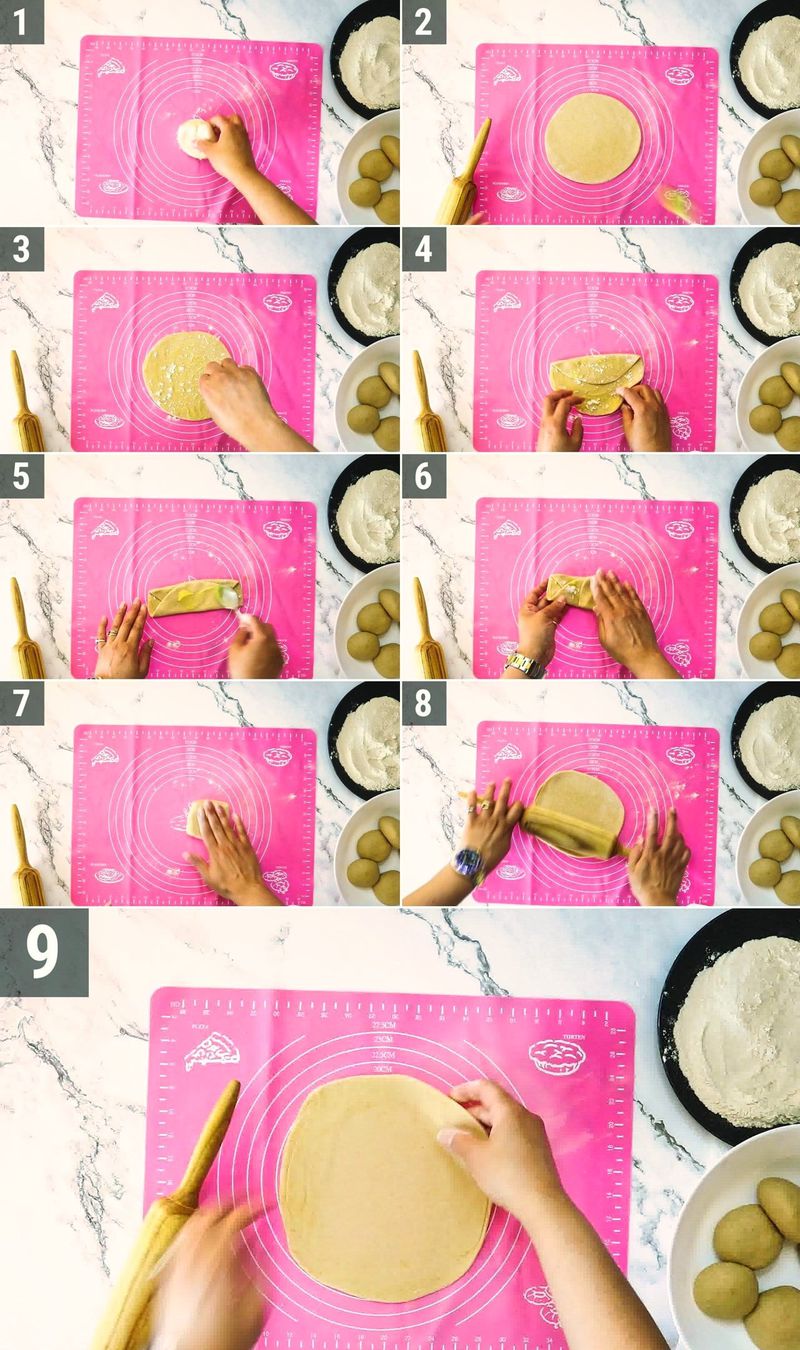
Triangle Paratha Rolling Technique:
- To create a triangle paratha, start with a ball-sized piece of dough. Gently dust it with dry flour and roll it out into a 4-inch diameter circle. Next, generously drizzle or brush 1 teaspoon of ghee onto the rolled circle and sprinkle it with some dry flour. Fold the sides of the circle to form a semi-circle. Now, brush half of this semi-circle with ghee again and sprinkle it with dry flour. Fold it once more to create a triangle shape. The application of oil or ghee during folding separates the layers, giving the paratha a delightful flakiness. Dust the triangle with dry flour and carefully roll it out to approximately 4-5 inches in size and to about ⅛th of an inch in thickness. Remember that parathas are typically rolled slightly thicker than rotis for a heartier texture.
- As an alternative method, take a dough ball and gently flatten it with your hands. Lightly dust it with dry flour and then roll it out with a rolling pin to create a 4-inch circle. Apply a small amount of ghee or oil onto the circle and sprinkle it with dry flour. Fold the sides of the circle inward, bringing them to the center. Brush the folded portion with ghee once more and sprinkle it with flour. Fold the dough to ⅓ of its width and then fold it again to the end, forming a square shape. Dust the square with dry flour and roll it out once more to a 5-inch square size.
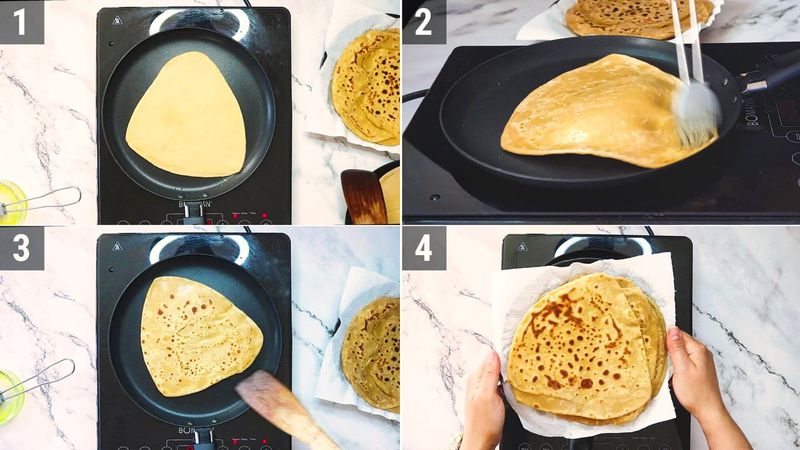
Cook the Parathas:
- Heat a griddle or tava over medium-high heat. Once hot, reduce the heat to medium. Place the triangular paratha on the hot griddle. Cook until you see small bubbles forming on the surface. Flip the paratha and apply ghee or oil on this side. Cook until both sides are golden brown and crispy.
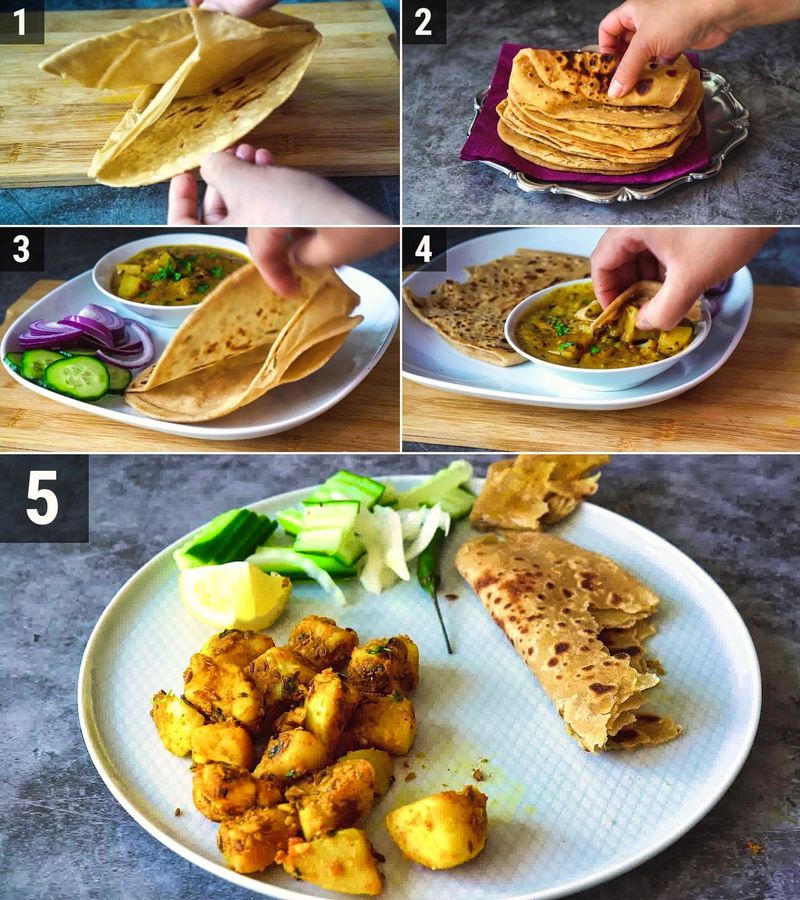
Serving Ideas:
- Now you have delicious plain parathas are ready. Serve your triangle-shaped plain parathas hot with your choice of accompaniments. You can enjoy them with yogurt, pickle, or any curry of your choice.
Recipe Card
Plain Paratha [Recipe]
★★★★★
(Rating: 5 from 9 reviews)
| Prep time 🕐 | Cook time 🕐 | Total time 🕐 |
|---|---|---|
| Category ☶ | Cuisine ♨ | Servings ☺ |
| Breads | Indian | 8 Parathas |
| Nutrition Info ⊛ | Serving size ⊚ | |
| 130 calories | 1 |
INGREDIENTS
For Plain Paratha
- 2 cups whole wheat flour (atta)
- 1/2 teaspoon salt
- 1 tablespoon ghee or oil (choose based on preference)
- 1/2 to 3/4 cup milk or water (choose based on preference)
- For Rolling and Frying:
- Ghee or oil for roasting
INSTRUCTIONS:
Prepare the Dough:
- In a mixing bowl, combine the whole wheat flour and salt. Mix them thoroughly. Add ghee (or oil) to the flour to enhance the flavor and texture of the parathas. Gradually pour in milk (for a richer taste) or water (for a lighter option) while kneading the dough. Adjust the amount of liquid as needed to achieve a smooth and soft dough. Cover the dough with a damp cloth and let it rest for at least 15-20 minutes. This resting period improves the softness and pliability of the paratha dough. After resting, divide the dough into equal-sized balls, each slightly smaller than a golf ball.
Triangle Paratha Rolling Technique:
- To create a triangle paratha, start with a ball-sized piece of dough. Gently dust it with dry flour and roll it out into a 4-inch diameter circle. Next, generously drizzle or brush 1 teaspoon of ghee onto the rolled circle and sprinkle it with some dry flour. Fold the sides of the circle to form a semi-circle. Now, brush half of this semi-circle with ghee again and sprinkle it with dry flour. Fold it once more to create a triangle shape. The application of oil or ghee during folding separates the layers, giving the paratha a delightful flakiness. Dust the triangle with dry flour and carefully roll it out to approximately 4-5 inches in size and to about ⅛th of an inch in thickness. Remember that parathas are typically rolled slightly thicker than rotis for a heartier texture.
- As an alternative method, take a dough ball and gently flatten it with your hands. Lightly dust it with dry flour and then roll it out with a rolling pin to create a 4-inch circle. Apply a small amount of ghee or oil onto the circle and sprinkle it with dry flour. Fold the sides of the circle inward, bringing them to the center. Brush the folded portion with ghee once more and sprinkle it with flour. Fold the dough to ⅓ of its width and then fold it again to the end, forming a square shape. Dust the square with dry flour and roll it out once more to a 5-inch square size.
Cook the Parathas:
- Heat a griddle or tava over medium-high heat. Once hot, reduce the heat to medium. Place the triangular paratha on the hot griddle. Cook until you see small bubbles forming on the surface. Flip the paratha and apply ghee or oil on this side. Cook until both sides are golden brown and crispy.
Serving Ideas:
- Now you have delicious plain parathas are ready. Serve your triangle-shaped plain parathas hot with your choice of accompaniments. You can enjoy them with yogurt, pickle, or any curry of your choice.
Watch Full Recipe Video:
NOTES:
- Always cook the parathas on medium heat for even and perfect cooking. The high heat will burn them, and with the low heat your parathas may turn soggy.
- When rolling parathas, use dry flour for rolling out the parathas. This prevents sticking and makes the rolling process smooth.
- When roasting parathas, press it down gently using a spatula. This helps in creating delightful layers.
- For added flavors, feel free to add the spices of your choice.
If this recipe helped you, then please spread the word by sharing and subscribing to us on YouTube to get more such Recipe Videos.
Your feedback is so helpful for me and other My Ginger Garlic Kitchen readers. So, for Facebook and Instagram, please mention @MyGingerGarlicKitchen or #mygingergarlickitchen. I would love to see your photos. :)
Author: Anupama
Recipe Source Link: https://www.mygingergarlickitchen.com/plain-paratha/

Questions or comments about this recipe:
Ask on