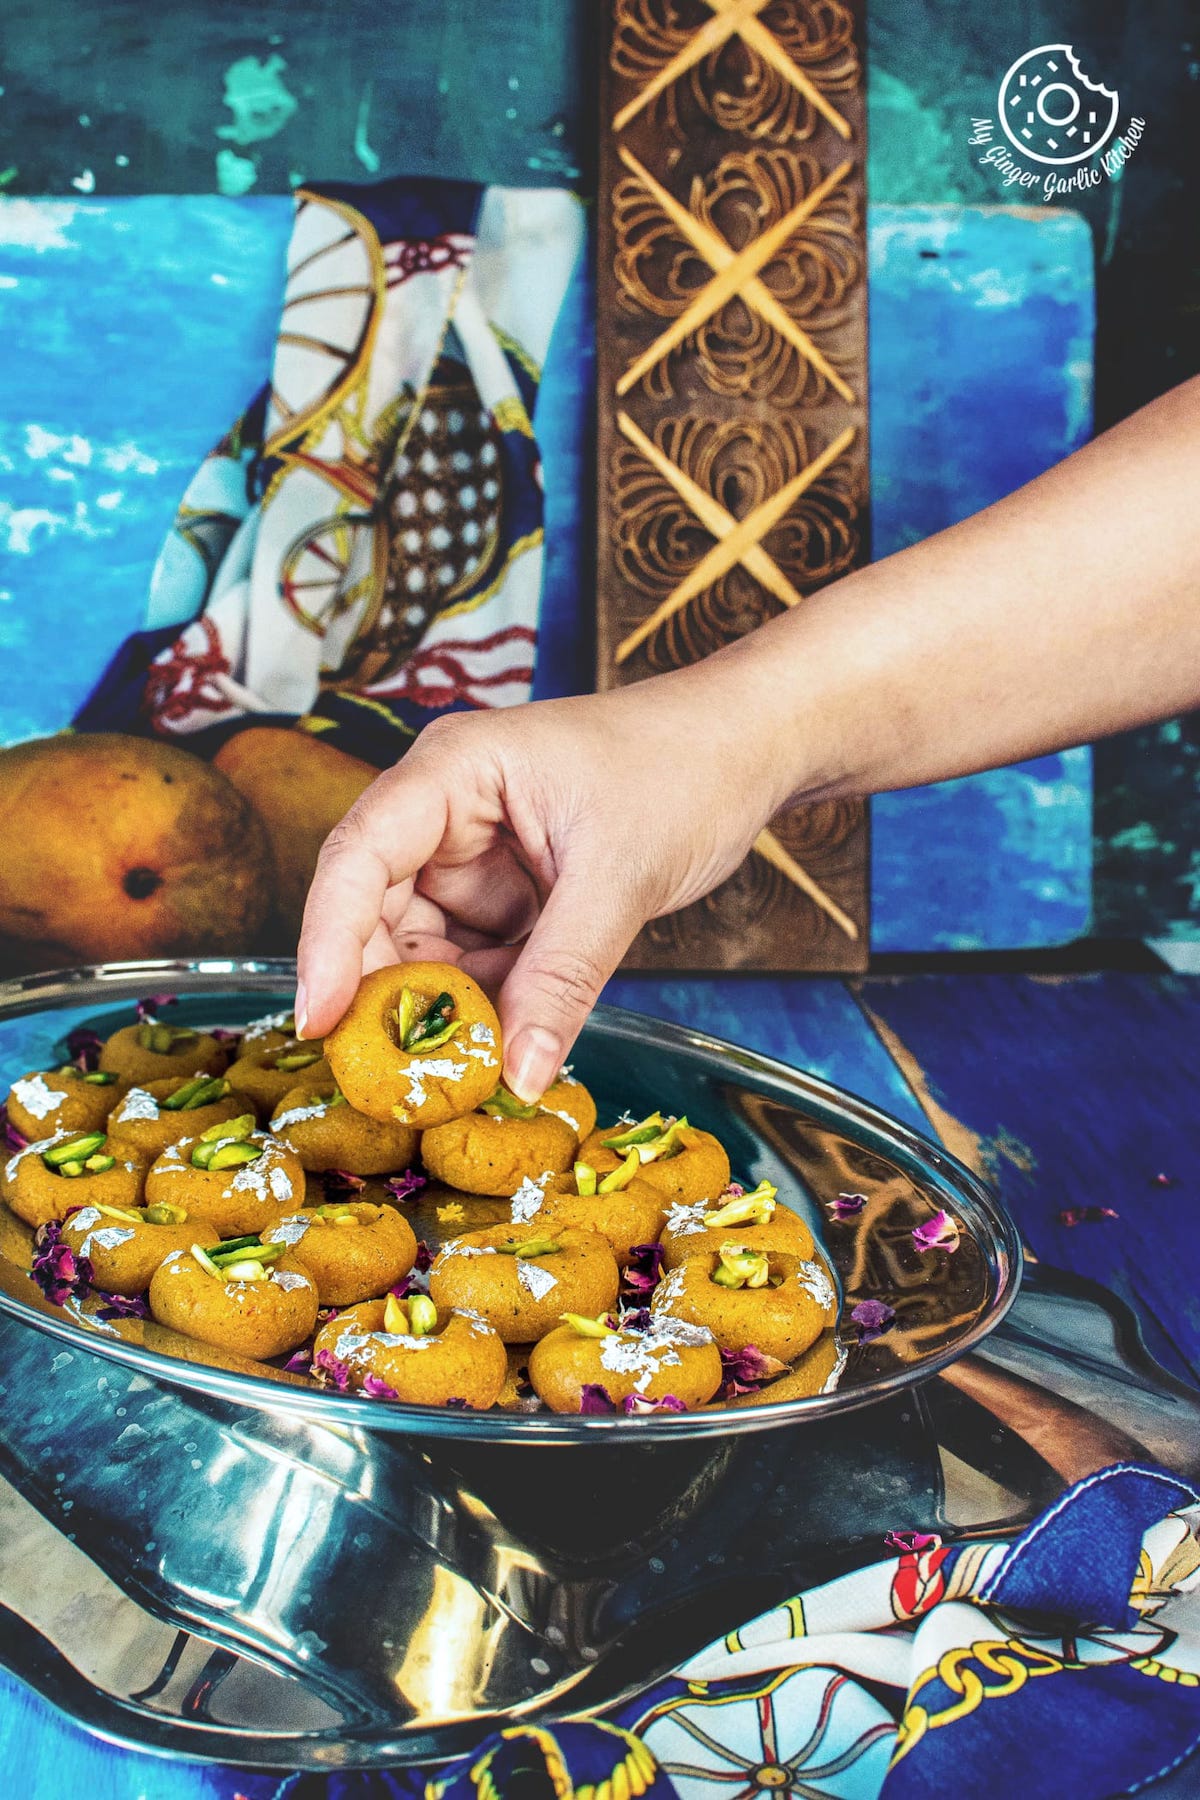
Mango Peda
Mango Peda or Aam Peda is a super delectable, rich and sweet lip smacking Indian dessert made with mango puree, milk powder and sugar.
Recipe Source Link:https://www.mygingergarlickitchen.com/mango-peda/
« Go back Print this recipe »
Prep Time = 05 minutes
Cook Time = 20 minutes
Total Time = 25 minutes
Category = Desserts
Cuisine = Indian
Serves = 22
Nutrition Info = 90 calories
Serving Size = 1 peda
RECIPE INGREDIENTS
» For Mango Peda //
- 1 & 1/4 cup unsweetened milk powder
- 1 large mango chopped, or 400 grams mango puree or pulp
- 1/2 teaspoon cardamom powder
- 1/3 cup warm milk
- 1/4 cup sugar
- 2 tablespoons ghee
- 8-10 saffron strands
- Edible silver leaves for garnish (optional)
- Sliced pistachios
RECIPE INSTRUCTIONS
» How To Make Mango Peda //
- Add chopped mangoes to a blender jar and blend to make a smooth puree. (If you want, you can also strain the puree, to get a velvety fiber-free puree). Keep it aside.
- Add saffron strands to warm milk, and set aside for 10 minutes.
- Grease a plate with some ghee and keep aside.
- Heat 1 tablespoon ghee in a pan over medium heat.
- Add prepared saffron milk to the pan, and let it come to a boil.
- Next, add mango puree and stir well to combine.
- Cook for 5 minutes and add sugar to it.
- Mix well and let it cook until sugar is dissolved completely, stirring occasionally.
- Next, add milk powder and mix well to combine. Make sure that there are no lumps. Break if there are any lumps.
- Cook for 5 minutes over medium heat, stirring continuously. And also, Keep scraping the bottom and the sides of the pan.
- Add cardamom powder and mix everything well.
- Now, cook for another 5 minutes over medium-low heat, stirring continuously.
- Add 1 tablespoon of ghee and cook until the mango peda mixture thickens.
- At this point, it would hold shape and separate from the pan. Turn off the heat.
- Transfer the hot mango mixture to a greased plate and flatten it using a greased spoon. Keep it aside for 5 minutes.
- After about 5 minutes, grease your palms with ghee and take a tablespoon of the mango peda mixture on your palm and shape up into a ball. Repeat until all the mixture is used.
- Place all the balls on a plate, and press each ball a little using the back of the spoon.
- For decoration, top each peda with sliced pistachios.
- Garnish each peda with edible silver leaves. Serve.
- Store mango pedas in an air-tight container.
RECIPE NOTES
- This is an instant version of mango peda which uses milk powder. If you dont want to use milk powder, then you can also use crumbled khoya. Replace milk powder with the same amount of khoya.
- For this recipe, you can either use freshly homemade khoya (mawa), or with the store-bought one.
- You can also add rose water or kewra water additives to the peda mixture.
- I used homemade fresh puree for this recipe, but you can also use store-bought mango pulp.
- I used homemade ghee for this recipe, but if you dont have ghee, then you can use unsalted butter.
- To make this peda more richer in taste you can replace 1/4 cup of milk powder with almond meal or ground cashews.
- If you are using sweetened milk powder, then you dont need to add any extra sugar.
- Always use a nonstick pan for making this peda. It prevents it from sticking to the pan.
- Non-fibrous, sweet, and ripe mangoes are best for making mango peda. But you can use any type of mangoes.
- Do not overcook this peda, or else it will turn rubbery and wont taste good.
- The mixture hardens after cooling. So make sure to cook it until it holds the shape.
- I garnished mango peda with pistachios. However, you can use any other dry fruits and nuts of your choice
- To store, line an air-tight container with the parchment paper and then store it. This stays fresh for 4-5 days at room temperature when kept in a cold and dark place.
- Refrigerate the container to increase the shelf life of this sweet. Mango peda keeps well for up to 10-12 days when kept in the refrigerator.
For questions and suggestions:
If you have any questions or suggestions about this recipe, please do contact us via this contact form or via the social channels:
Website: www.mygingergarlickitchen.com // Contact Form // Facebook Page // Youtube Page // Instagram Page // Pinterest Page