Indian Milk Cake (Alwar Ka Mawa)
Indian Milk Cake aka Alwar Ka Mawa is a traditional Indian milk fudge prepared with full cream milk, sugar, ghee, and a coagulant. Making this is very simple.
Recipe Source Link:https://www.mygingergarlickitchen.com/indian-milk-cake/
« Go back Print this recipe »
Prep Time = 5 minutes
Cook Time = 2 hour(s)
Total Time = 2 hour(s) 5 minutes
Category = Desserts
Cuisine = Indian
Serves = 22 pieces
Nutrition Info = 240 calories
Serving Size = 1 piece
RECIPE INGREDIENTS
» For Indian Milk Cake (Alwar Ka Mawa):
- 2.5 liters Full Fat (whole) milk
- 4 tablespoons ghee
- 1 teaspoon lemon juice, or more if needed (alternatively, you can use 1/4 tsp citric acid / or alum powder)
- 1 cup sugar, or to taste
» For Garnish:
- Edilbe sliver leaves
- Pistachios
RECIPE INSTRUCTIONS
» Make Indian Milk Cake (Alwar Ka Mawa):
- Add 2.5 liters of milk to a thick bottomed pan. Bring it to a quick boil over high heat while stirring in between.
- Once it starts to boil, lower the heat. Simmer until the milk has reduced to one-third of its volume. Keep stirring in often to avoid it from burning and sticking to the bottom of the pan. Also using a flat spatula, keep scraping down the milk cream (malai) sticking to the sides of the pan.
- After reducing, milk should have the grainy fat granules, shown in the picture below. Now, add coagulant (acidic agent) and keep stirring over low heat. After 2-3 minutes, you will notice that the milk would start to curdle and little whey would be separated. This is the consistency we are looking for in this milk cake recipe.
- Stir the milk well and keep cooking the mixture until whey almost completely evaporates.
- Now add sugar in four small batches. Add the first batch and mix well until sugar is dissolved completely.
- Keep adding, mixing, and stirring until all the sugar is used up.
- Cook the mixture until the mixture has a thick consistency. The mixture would turn light brown in color after all the moisture evaporates.
- At this point, start adding 4 tablespoons ghee little by little. Add 1 tablespoon and let it combine with the mixture. Repeat till all the ghee is added and mixed.
- Keep cooking over medium-high heat, until the milk cake starts to leave sides and changes the color slightly. At this point, milk would release a nice fragrant caramelized aroma.
- At this point, milk will release a nice fragrance and a light to dark brown color. Turn off the flame and let it cool a little.
- Grease a thick and deep saucepan, baking pan (or mold) for setting milk cake.
- Immediately transfer the cooked milk mixture into a greased pan. Level and make uniform from the top by pressing with a silicone ladle or something similar.
- Smoothen the top and spread the mixture evenly with a greased spoon or silicone spatula. Cover the pan with the lid.
- Now, wrap the pan with a thick towel and keep it aside to set for 4-8 hours.
- After the setting time is over, uncover the pan. And loosen the sides of the pan with a hot knife.
- Flip the pan over and demould. If the milk cake is not coming out easily, then place the tin on low heat for about 30 seconds and then flip it onto a wooden board or plate.
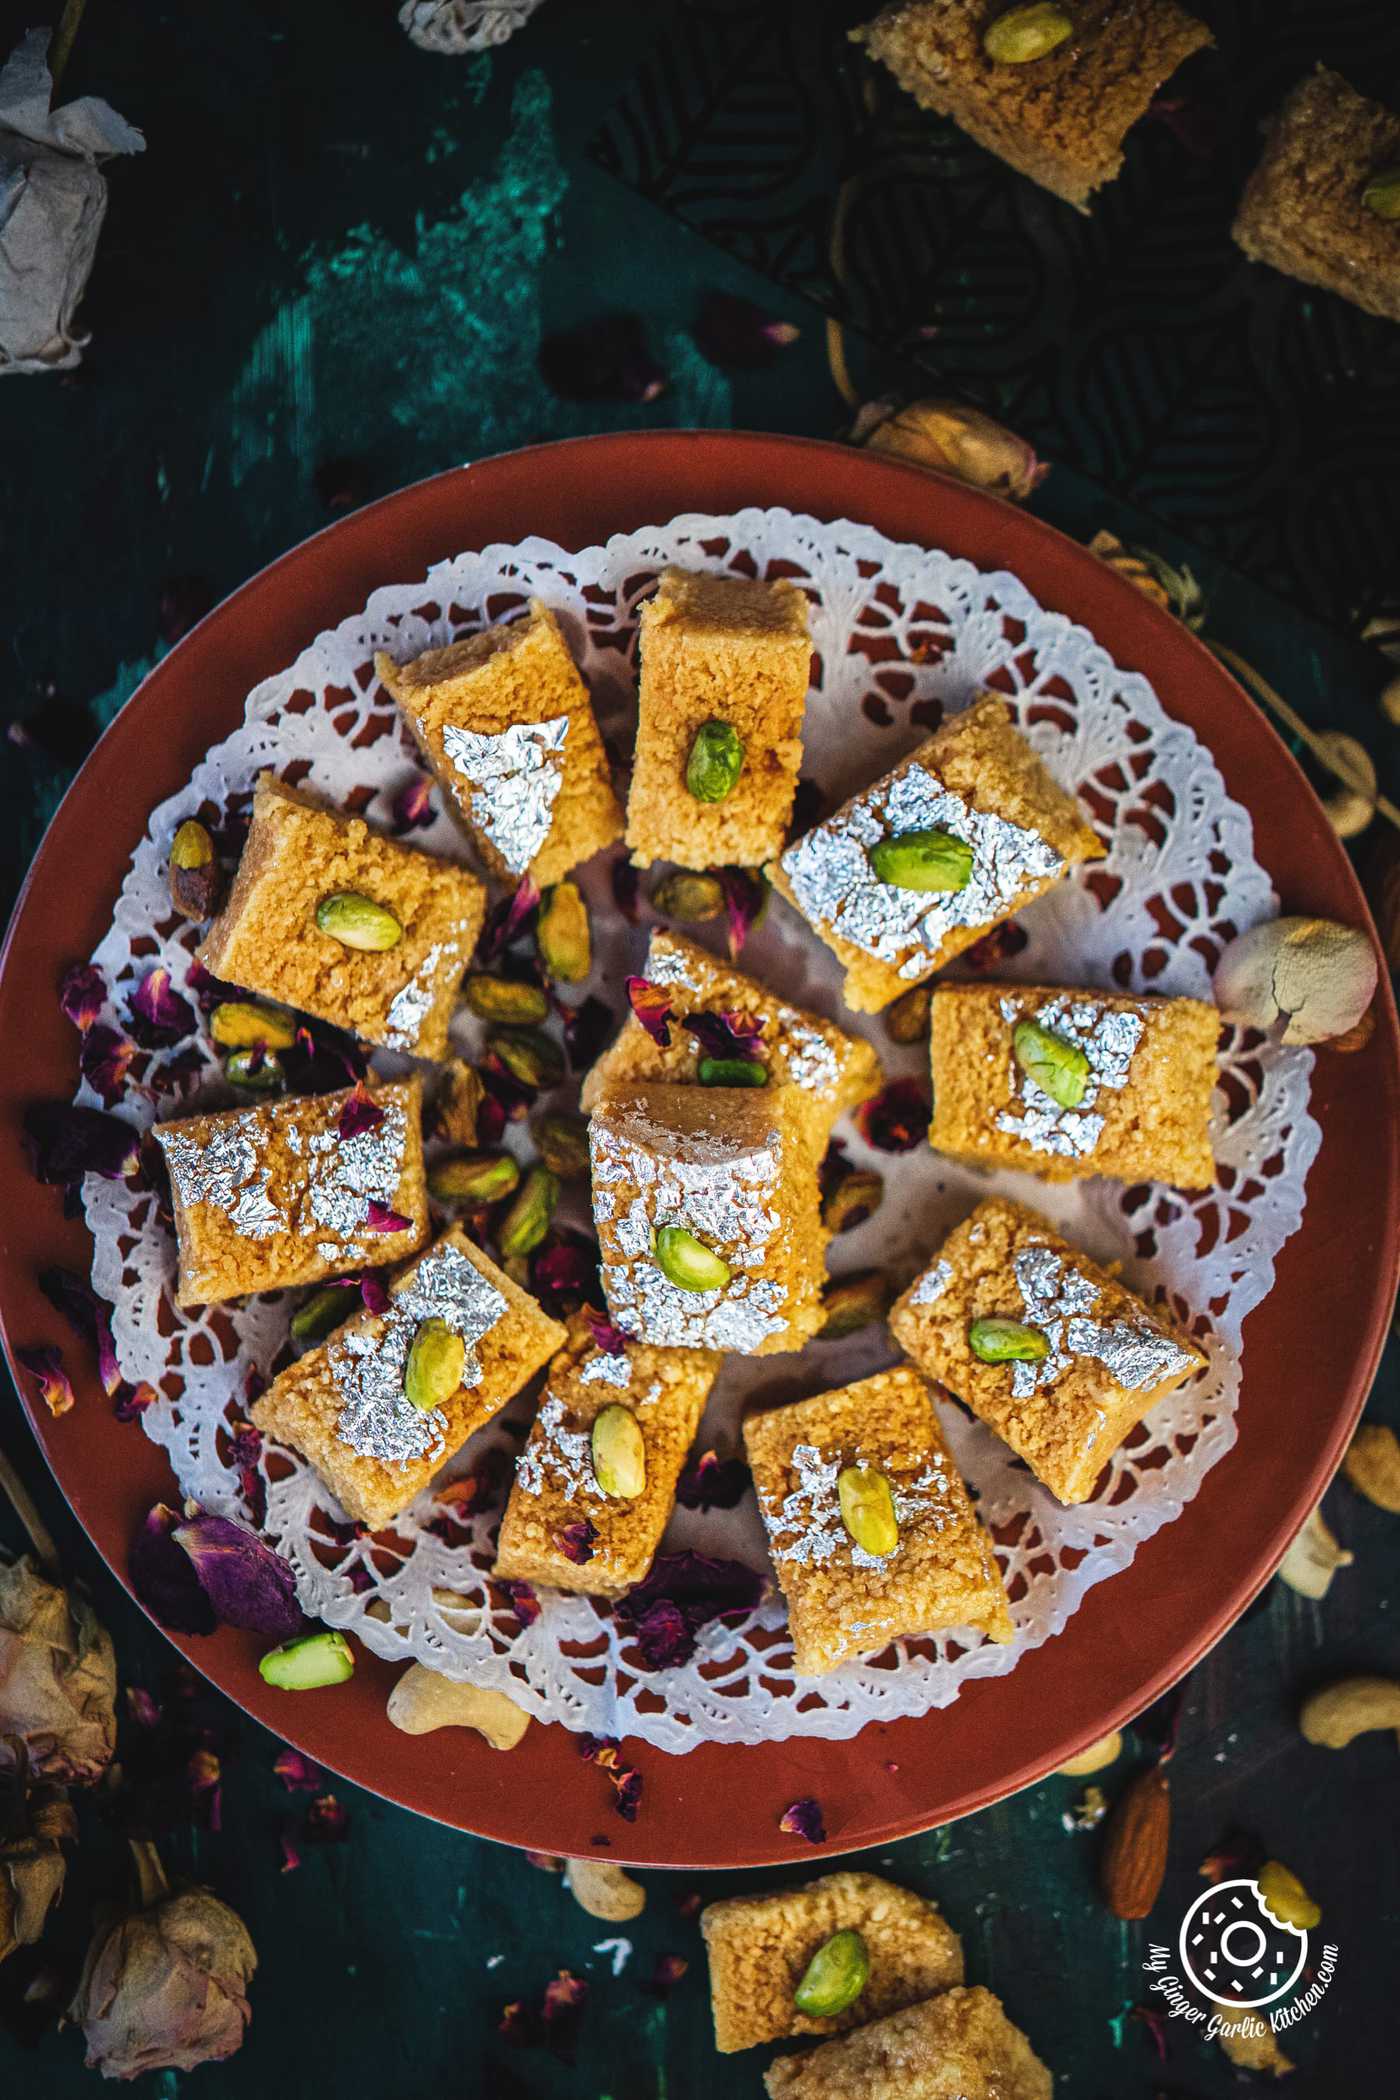
- Cut the milk cake into slices. Decorate with edible silver leaf, pistachios, or any other dried fruit. Serve fresh or store in the refrigerator in a kitchen tissue-lined airtight container for up to 7 days.
RECIPE NOTES
- Never use an iron (kadhai) or non-stick pan for cooking milk cake. Rather use a thick bottomed steel pan.
- Make sure that milk should only slightly curdle, therefore add acidic agents little by little. If you add too much acidic agent at once, then the milk would fully separate from the whey, and we certainly don't want that.
- Milk cake's ideal texture is grainy. If you want grainy, yet melt-in-mouth and soft milk cake then you need to make sure you add only a little acidic agent. If you would add so much acidic agent, then the milk cake would turn rubbery and chewy.
- Always use full-fat milk (preferably cow?s milk) to get more palatable Milk Cake.
- After adding sugar, milk will become bubbling hot. Make sure you cook a bit away from the pan and use a long handle to prevent yourself from burning. You can also use gloves.
- If you want a good grainy texture of milk cake, then make sure you are adding lemon juice only after the milk has reduced to 1/3 of its quantity.
For questions and suggestions:
If you have any questions or suggestions about this recipe, please do contact us via this contact form or via the social channels:
Website: www.mygingergarlickitchen.com // Contact Form // Facebook Page // Youtube Page // Instagram Page // Pinterest Page